
Resonance: A Plague Tale Legacy Resonance Puzzle Solutions
How to use the stolen sphere, split light, and read Sophia's sketchbook.
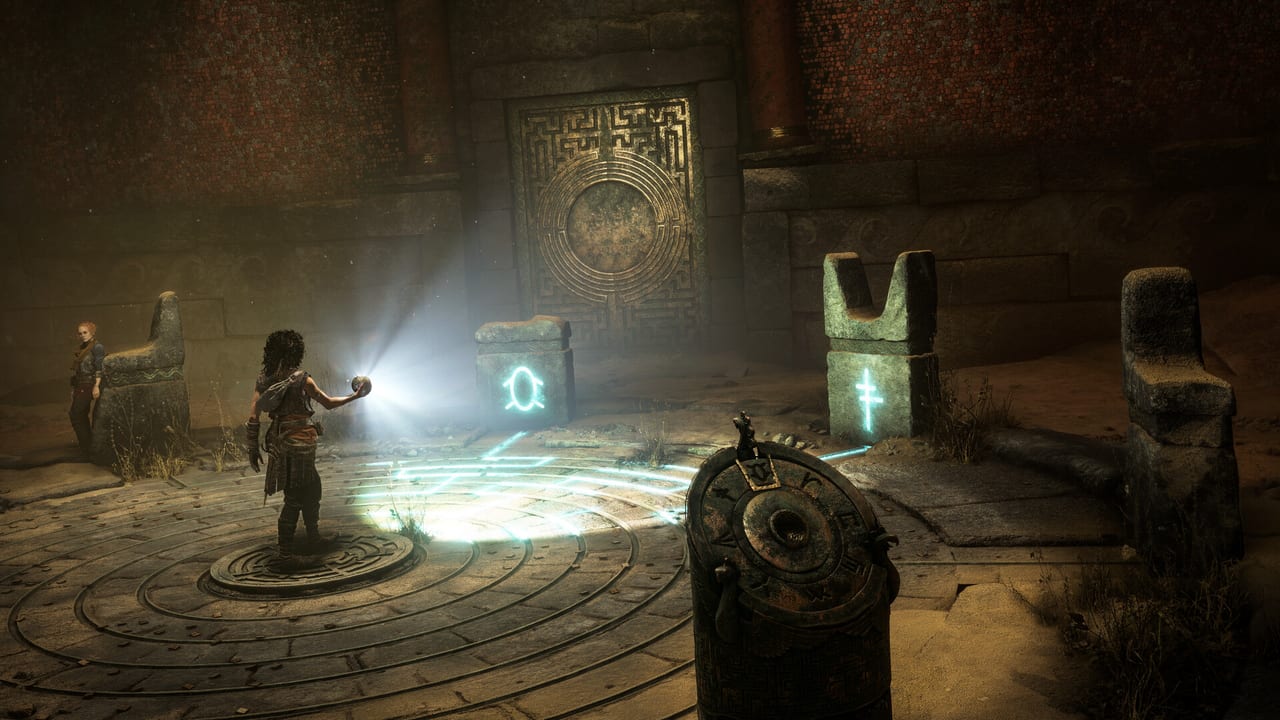
Most story stops in Resonance: A Plague Tale Legacy are light machines, not lockpick minigames. Daedalus built the island around a stolen Minoan sphere that Sophia uses as a lamp, a prism, and a key. Official trailers say it plainly: seek areas bathed in light, split the beam into stained-glass colors, and do not let the dark consume you. This page is the how-to-solve layer. Chapter routing stays on the walkthrough.
Puzzles are generous compared with later Tomb Raider tombs. Reviewers called some of them simple. They still halt the story if you ignore the sketchbook. Always open the notebook when the game highlights a fresco, a ring of symbols, or a three-beam door.
The sphere in three modes
Lamp mode lights a path and keeps the hunter at bay in underground chapters. Insert mode slots the orb into a pedestal and raises mirrors, gates, or murals. Prism mode splits a beam into red, green, and blue. IGN compared the toy to Alan Wake’s flashlight crossed with a Baldur’s Gate prism. You aim, you do not craft ammo.
When a pedestal lights blue lines on the floor, follow those lines to wall symbols. The floor is the legend; the wall is the lock. Shine the sphere at each pedestal in turn until you have mapped every linked icon, then commit the combination.
Chapter 4: first trial rooms
From Hell It Rose opens the three-pedestal symbol room. Use the sphere on each pedestal, read the blue floor lines, and match wall marks. Later, two mirrors must hit two linked blue icons at the same time. Do the pairs separately. Missing wall icons repeat the order already drawn on the ground. PowerPyx’s chronological list is the cleanest text solution if you want step-by-step without a video.
A later jumping sequence uses Dots, Kraken, and Flower platforms with numbers for hop counts. The long path grabs a hidden relic after you climb left and shimmy a gap. The short path skips that relic. If you are on a collectible run, take the long path and then return to the collectibles checklist.
Mirrors, Leni, and murals
Several island doors are two golden receptors. Raise the mirrors, aim each beam, then help Leni lift a collapsed mirror so the last mural lights. Order matters: light the two intact murals first, then use the leftover mirror as a bounce into Leni’s hold. If a mural stays dark, you aimed at the near receptor instead of the paired one across the room.
Watchtower puzzles use the wooden looking glass. Line the red stick with a distant red mast to form the X drawn in the sketchbook. That is navigation, not combat. Grab the Resonance Point on the tower floor before you leave.
Parallel Paths maze
Chapter 10 is the maze people search for. The sketchbook shows each symbol and the direction you should walk when you see it. Do not improvise corridors. When you reach the three-ring puzzle, IGN’s solution is:
- Inner ring: circular shield → sword → serpent. Point green at the serpent.
- Middle ring: quiver → bow → upward arrow. Point red at the upward arrow.
- Outer ring: long shield → spear → pronged F. Point blue at the pronged F.
If a gem is already on the right mark, leave it. Fighting the rings at random is how you add twenty minutes.
Light as a survival rule
From Chapter 6 onward, a presence hunts in the dark. Standing in a lantern pool is the mechanic. The Look For The Light trailer is the official reminder: when cornered by shadows, move to light. That is not a Daedalus door, but it uses the same lamp. If you are dying in chase halls, you are fighting instead of running to the next lantern. The walkthrough flags those beats; this page is for the rooms that wait for a correct beam.
Habits that prevent stuck hours
Read every fresco. If Sophia writes in the book, the answer is in the book. When two colors must land at once, assign one mirror per color and do not swing both at the same wall. When platforms show a count, hop that many times, then stop. When a collectible sits off a puzzle path, grab it before you insert the sphere into the exit pedestal, because some exits raise a one-way lift.
Combat skills do not solve puzzles. Spending Resonance Points on Echo’s Return will not aim a mirror. Keep the combat guide closed until the door opens. If you came here from a search for “how to complete the trial” or “how to beat the maze,” you want this page plus the Chapter 4 and Chapter 10 rows in the walkthrough table.
Sophia’s notebook is the real HUD. Treat it like an Uncharted journal, not like optional lore, and the island stops feeling like a riddle den.
Frequently Asked Questions
Quick answers to the most common questions.
Do I need a guide for every puzzle?
No. Most rooms telegraph the answer on the floor or in the sketchbook. Use this page for the three-pedestal room, paired mirrors, jumping relics, and the Chapter 10 rings.
What do the three beam colors mean?
Red, green, and blue are just channels. Match each color to the gem or receptor the room painted in that color. There is no elemental damage tied to a color.
Can I skip a puzzle?
Story trials cannot be skipped. Optional jumping paths can, but you will miss relics. Difficulty sliders do not auto-solve light rooms.
Where do puzzles sit in the campaign?
They densify from Chapter 4. Chapter 8 has none. Chapter 10 is the maze. See the walkthrough for the full order.