
Resonance: A Plague Tale Legacy Boss Fights Guide
Strategy for every named encounter in Resonance: A Plague Tale Legacy, from the Chapter 1 mercenary to the Chapter 13 Minotaur statue fight.
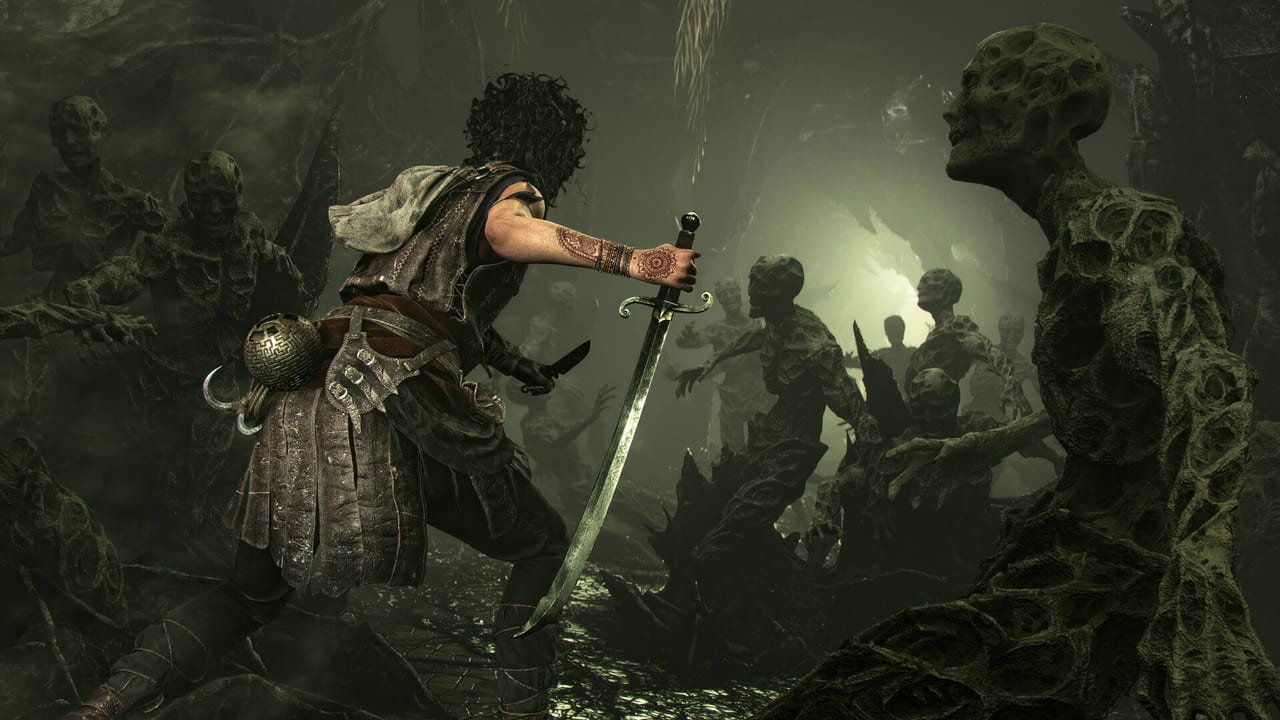
Resonance: A Plague Tale Legacy has fewer boss fights than a typical action-adventure, but each one rewards a different combat verb. There is no stamina bar, no parry-spam, and no Souls-style dance. The campaign teaches parry in Chapter 1, parry-and-kick in Chapter 3, sphere-beam against Petrified soldiers in Chapter 11, and the full moveset against the final Minotaur statue in Chapter 13. This page is the playbook for every named encounter on the main path. Combat buttons live on combat-tips and combat. Charm stacks and blade loadouts are on the charms and blades tier lists. Trophy conditions for these fights sit on trophies. The dual-timeline framing around these encounters lives on the Theseus’s Echoes page.
The five boss-tier encounters on the main path are: Valerio (Chapter 1, sword), the Chapter 3 Sica Captain (shield + spear), the Creature chase sequences in Chapters 6, 9, and 12 (survival, not combat), the three-phase Irene duel in Chapter 11, and the Minotaur statue fight in Chapter 13. Mini-boss encounters like the Petrified Soldier trios in Chapters 11 and 12 sit between these and use a different mechanic (decapitate with a Critical Strike after a stagger, then burn with Light Concentrate).
There is no optional boss. There is no raid. There is no arena. All fights are linear story beats.
Valerio (Chapter 1, parry tutorial)
Valerio is the Chapter 1 sword-and-board mercenary Sophia duels in the pit after the prologue. He is the first parry tutorial and the first stagger meter the player sees. The fight has two phases: a one-on-one tutorial where Sophia has to fill his stagger meter by parrying his white attacks, and a follow-up brawl where Sophia has to use attack, block or parry, and dodge against him at full health.
Strategy. Parry his horizontal slash to build stagger. The first phase ends when the stagger bar fills and his posture breaks. In phase two, dodge his thrust, parry his slash, and use a Critical Strike to interrupt his recovery. Valerio has no yellow or red attacks. He never blocks. He never grabs. He is the easiest named fight in the game and the intended first hour.
Rewards. Unlocks the parry timing for the rest of the campaign. Unlocking Valerio is also the trigger for the Irene parry tutorial that follows.
Trophies. None. Valerio is an unmissable story encounter. There is no achievement for defeating him.
The Mercenary (Chapter 1, kick tutorial)
After the prologue, Sophia fights a mercenary in the pit who dominates the locals. The fight teaches kick as the answer to defensive postures. The mercenary has a sword and shield; he raises the shield after a few swings to block Sophia’s frontal attacks.
Strategy. Attack him three to four times until he raises his shield. Kick him once to break the guard. Hit him with a heavy attack while the shield is down. Repeat. He has no parry-punish pattern; the kick is guaranteed after a shield raise. Once his health bar drops to zero, the announcer dies and four reinforcements spawn.
Strategy for the reinforcements. Group them near a wall or cliff edge. Kick three of them off the edge. There are four of them; three kicks over a ledge clear the arena. If you cannot find a cliff, parry and kick in sequence. The fight ends when the fourth enemy dies.
Rewards. Unlocks the kick verb as a combat tool. The four-reinforcement section is also the unlock for the tips and bestiary patterns.
Trophies. None directly. The Overboard trophy (kick 20 enemies off a drop) is satisfied in part by the four-reinforcement follow-up.
The Sica Captain (Chapter 3)
The Sica Captain is the Chapter 3 mounted enemy that ambushes Sophia on the cliffside shortly after she reaches the giant golden statue. He is the first enemy with a yellow parry attack and the first time the game asks the player to handle a yellow flash with a parry rather than a dodge.
Strategy. Bait his horizontal slash (white) and parry to fill stagger. Bait his downward thrust (yellow) and parry again to fill more stagger. When the stagger bar fills, the captain staggers for one second; use a Critical Strike for heavy damage. He has no grab, no red attack, and no projectile. He does not summon reinforcements. The fight ends when his health bar empties.
Rewards. Unlocks the yellow parry timing. After the captain dies, Sophia reaches the watchtower and the Chapter 3 puzzle gauntlet begins.
Trophies. None.
The Creature (Chapters 6, 9, and 12)
The Creature is not a boss in the combat sense. It is the late-game threat that hunts Sophia through dark corridors and requires her to use the island’s light infrastructure to survive. There are three extended Creature sequences in the campaign: Chapter 6 (the water-wheel chase), Chapter 9 (the lantern chase), and Chapter 12 (the quarry chase). Each one rewards running from light source to light source and never engaging.
Strategy (universal). When the Creature is hunting, sprint only when you are between two light sources. Walk, do not run, when you are inside a permanent light source, because the Creature sees motion. Light Concentrate mode on the sphere can burn the Creature for a few seconds; this is the basis for the Refraction trophy, which requires burning it 10 times across the campaign.
Chapter 6 (water-wheel). The Creature appears in the large chamber where Sophia is supposed to use the mirror to dissolve Petrified shards. Sophia has to break a wooden crate to expose the mirror, then keep light on the Creature as it approaches. Two Petrified Soldiers spawn during the sequence. Light, run, repeat.
Chapter 9 (lantern chase). This is the longest Creature sequence. Sophia crawls through a gap after killing soldiers around a fire, and the Creature turns a soldier to stone in front of her. From there, Sophia has to navigate ruined buildings and waterways while the Creature stalks. Keep breaking braziers to keep the area lit. Reach the final light source at the top of the staircase to break line of sight. The chase ends with the Chapter 9 Charm 2 (Pierced Coin Theseus’s Echo) on the left.
Chapter 12 (quarry). The Creature re-emerges during the boat-crossing rooms. There is no light source for a stretch; Sophia has to use Light Concentrate to keep the Creature at bay and to dissolve the Petrified blocking the path. The chase ends when Sophia reaches the central beam light and Faro opens the passage.
Rewards. All three sequences are required to reach the end of their respective chapters. There is no bonus for completing them faster than the scripted time.
Trophies. Refraction (Light Concentrate the Creature 10 times), Close Call (survive the Creature by a hair’s breadth 5 times), Unpredictable (jump a gap 25 times while chased), Baitfish (lure 20 Petrified while chased). All four trophies can be earned across the three Creature sequences.
Petrified Soldier Trios (Chapters 11 and 12)
Petrified Soldiers are the late-game hybrid enemy. They look like the Petrified stone corpses that respawn from the corridors, but they have stagger meters and HP bars and they attack with sword swings and grab attacks. IGN’s Chapter 11 walkthrough introduces them as a new enemy type the first time the player reaches Chapter 11.
Mechanic. Petrification is replaced by stagger. Stagger them with parries and heavy attacks until the meter fills, then land a Critical Strike to decapitate them. After decapitation, blue fronds sprout from the neck and the soldier becomes vulnerable to light: stand in a light source, aim the sphere’s Light Concentrate mode at the exposed fronds, and burn their health away. They can also fire a blob of blue acidic goo that leaves an AoE hazard on the floor; dodge and steer clear.
Strategy (Chapters 11 and 12 trios). The first trio appears after Sophia uses the sphere to dissolve shards on the main path. There are two Petrified Soldiers in the initial pack, with three more added by a second Petrified spawn during the chase. Group them. Parry to stagger, Critical Strike to decapitate, then burn with Light Concentrate from inside a light source. They die in three to four seconds of focused Light Concentrate. They cannot be parried while staggered.
Rewards. Each Petrified Soldier drop is a Charm or a Resonance Point. They do not drop Blades or Artefacts. They count toward the They Were People trophy (destroy 100 Petrified with light), which includes both stone corpses and decapitated soldiers.
Trophies. They Were People (100 Petrified destroyed with light) is shared with the stone corpses in the corridors. The Inherited Brutality trophy (kill 4 enemies with one Focus attack) is easiest to do during a Petrified Soldier trio in Chapter 12 once the Focus Gauge is unlocked.
Irene (Chapter 11, three-phase duel)
Irene is the Chapter 11 boss fight and the largest single duel in the campaign. IGN’s Chapter 11 walkthrough describes the three phases in full. The fight happens after Irene ambushes Sophia and Faro in the tunnels beneath Daedalus’s workshop. Faro is mortally wounded during the ambush cutscene; Sophia fights Irene alone.
Phase 1 (sword)
Irene opens with a one-handed sword. She frequently takes up the defensive stance with her sword raised; disrupt it with a kick. The basic chain is a horizontal slash into a thrusting stab, then two horizontal slashes, then a final overhead unblockable slash. The chain is parryable for stagger. A second variant starts with a thrust, two back-and-forth slashes, and a yellow thrust. A third variant is a downward diagonal slash into a yellow diagonal slash. None of these are grab attacks.
Strategy for phase 1. Keep distance, dodge the chains, parry the yellow hits to build stagger, then rush in for one or two hits after the chain ends. Critical Strikes are easiest to land on the recovery frames. Use the Focus Gauge sparingly: Sphere Beam is overkill here and you want to save it for the late-game Petrified trios.
Phase 2 (two daggers)
After the first health bar empties, Irene switches to two daggers. She is faster, more aggressive, and closes distance more often. New moves include a slash-stab-alternate chain that varies in length and ends with a dash away, a ranged dagger throw (unblockable, dodge based on the indicator over her head), and a grappled-tackle if Sophia tries to use the grappling hook on her (block or dodge immediately after grapple to avoid the aerial slash). She also gains a yellow 360-degree spin with both daggers (parry once).
Strategy for phase 2. The grapple on Irene pulls her in but she leaps at Sophia with a downward aerial slash. Block, parry, or dodge immediately. The ranged dagger throw can be dodged left or right based on the indicator; if you parry it, it drops to the ground as a throwable, and you can use it on her. Using grapple to interrupt a ranged dagger throw is a strong strategy if you cannot read the dodge direction. Keep distance, parry the spin, and bait the chains.
Phase 3 (two daggers, vanish attacks)
After the second health bar empties, the third phase opens. Irene keeps the daggers but adds vanishing attacks. She dashes out of the arena, the camera unlocks, and a yellow alert appears as she throws a dagger from outside the arena. Parry or dodge to make her re-enter. Another new attack is a yellow 360-degree spin where both daggers are unblockable; a third variant has both daggers unblockable with the third dagger being yellow. She also throws multiple daggers in quick succession: first two unblockable, third yellow. She vanishes at 50% and again at 25% health.
Strategy for phase 3. When she vanishes, keep parrying the re-entry dagger to gain throwables. Each parried dagger becomes a thrown dagger that does high damage. Use the spheres (Light Concentrate or Sphere Beam) once she is back in the arena to lock her down. The fight ends when her third health bar empties; Sophia lands the killing blow.
Rewards. Unlocks the Chapter 11 ending. Faro holds the passage open for Sophia to continue. The fight does not drop loot, but it does unlock the Excessive Force trophy if Sophia broke free from a Corrupted grab with a Focus attack during the same chapter (any Petrified Soldier grab counts).
Trophies. None specific to Irene, but her unblockable attacks unlock the right muscle memory for the Skilled Maneuverer trophy (stun 3 enemies with Echo’s Return), which is easiest to do on the chapter 12 Petrified Soldier trios.
The Minotaur Statue (Chapter 13, final boss)
The Minotaur statue fight is the campaign’s final boss. It happens after Sophia reaches the central beam in the Inner Sanctum. The blue heart of the Minotaur statue is the target; Sophia has to hold the sphere in Light Concentrate mode against the heart while dodging the statue’s melee attacks. The statue slams the floor, swings its arms, and turns toward Sophia on a long telegraph.
Strategy. Stand at the maximum Light Concentrate range so the heart stays lit without Sophia being in melee range. When the statue raises its arm to slam, dodge backward; the slam has a one-second recovery. When the statue turns, sidestep; the turn is the unblockable phase. After each slam, the statue pauses for two to three seconds; that is the window for a Sphere Beam or a charged dagger finisher. The fight ends when the heart’s health empties.
Rewards. Ends the campaign. Plays the Chapter 13 ending cutscene.
Trophies. The fight itself does not gate a trophy. The Like a Warrior trophy (all 6 Mastery branches) is gated by the Resonance Point spend, not by the Minotaur statue fight.
What this page does not cover
- Optional bosses. There are none.
- Arena fights. There are none.
- New Game Plus modifiers. NG+ keeps the same bosses with raised HP. The fight list is on the new game plus page.
- Boss rush modes. There is no boss rush mode.
If you came here looking for how to spend Resonance Points on skills that make these fights easier, the spend order is on the skills tier list. If you want Charm stacks that make Irene’s unblockable slashes survivable, the rank list is on the charms tier list. If you want to know what each Blade does to a boss stagger meter, the per-blade notes are on the blades tier list.
Frequently Asked Questions
Quick answers to the most common questions.
How many boss fights are there in Resonance?
Five named encounters on the main path: Valerio (Ch 1), the mercenary brawl (Ch 1), the Sica Captain (Ch 3), the Creature chases (Ch 6, 9, 12), the three-phase Irene duel (Ch 11), and the Minotaur statue (Ch 13). There are also Petrified Soldier trios in Chapters 11 and 12 that play like mini-bosses.
Is there an optional boss in Resonance?
No. All five named encounters are story-locked. There is no raid, no arena, and no boss rush mode.
Can you fight the Creature?
No. The Creature cannot be killed in any of the chase sequences. The Refraction trophy (burn it with Light Concentrate 10 times) does not kill it; it only burns it for a few seconds. Survive the chase by moving from one light source to the next.
How many phases does the Irene fight have?
Three. Phase 1 is one-handed sword, phase 2 is two daggers with grappled-tackle and ranged throws, phase 3 adds vanish-and-re-entry attacks. Each phase has its own health bar.
What is the strongest Charm for boss fights?
Trinkets (slight chance to survive lethal damage) and Arm Bands (wider parry window). Both stack, both auto-equip. Five Trinkets is the difference between a one-shot death and a clutch survival on the Minotaur statue fight.
What is the strongest Blade for boss fights?
The Xiphos (parry break, more stun on parry, cannot block) and the Khopesh (deep bleed, damage over time on combo end) are the two highest late-game options. The Xiphos wins for stagger-heavy bosses; the Khopesh wins for HP-heavy bosses.
Does boss difficulty change on New Game Plus?
Yes. Enemy HP rises by 50% and damage numbers rise by 30% on NG+. The fight order and mechanics are unchanged. Charm slots, blade tiers, and skill masteries carry over.
What level should I be for the Minotaur statue?
There are no levels. Spend Resonance Points on the skills and masteries that match your play style, keep Charm stacks at five per type, and bring the Xiphos for parry damage. The fight is mechanically simple; it tests parry timing and patience.